
I love Halo: Combat Evolved, and even more particularly, I love the mission The Silent Cartographer. I have warm memories of going to my local toy store and playing the mission over and over again on their demo Xbox setup. The way in which Halo: CE depicts its marine NPCs was a big inspiration for DANGER CLOSE, and given that the ruleset is essentially complete now, I figured it’d be a fun exercise to try and capture the vibe of that mission in DANGER CLOSE!
And this isn’t even the first time I wrote about Halo and TTRPGs:
Halo as a Fantasy TTRPG Campaign
First of all, this is DANGER CLOSE:
…and you can find the rules (and this mission!) for free on Itch.io.
Mission & Sectors
DANGER CLOSE splits missions into Sectors; the areas you move through with your Squad to reach an objective. At its core, a Sector has…
- Its contents; an enemy force, a boon, or a moment of rest. “Threat Level”, or TL, is how the degree of enemy resistance is labeled, ranging from 1 to 4.
- Cover: How much clutter there is to hide behind. This affects the Squad’s ability to shield themselves from harm. It can have 3 values:
- 0 – Exposed. No real cover.
- 1 – Normal. Scattered cover.
- 2 – Dense. Rubble, solid walls, barricades.
- Space: How easily the Squad can maneuver into advantageous positions. This affects the Squad’s ability to flank. It also has 3 values:
- 0 – Tight: Tunnels, narrow corridors, trenches.
- 1 – Transitional. Courtyards, broken streets, alleyways.
- 2 – Open. Plazas, squares, promenades, fields.
Often, there’s some relation to Cover and Space; Open Spaces are more likely to be Exposed. Then again, a narrow corridor (Space: Tight) could be Exposed if it truly has no discernable features, or Dense if there’s plenty of support pillars and the like along the walls. An Open space can have numerous destroyed vehicles laying around, making it Dense, cover-wise.
In terms of notation, a Sector can thus be described as
[Sector Name] [Cover Value]/[Space Value]/[Threat Value]
Ruined Courtyard C1/S1/TL2
Anyway, this is our main task: Looking at the mission The Silent Cartographer, splitting it in to Sectors, and assigning the correct ‘values’ to those sectors.
The Core Beats
Sector are pretty abstract, on purpose. You can zoom in or out as much as you want; you could make a fight over a single building into multiple Sectors, with each hallway or room a new one.
For our mission, I want to keep it somewhat streamlined, though. I would note the core experience of the mission as:
- Landing on the beach. TOUCHDOWN, HIT IT MARINES!
- Driving along the beach, minor skirmish
- Locate the entrance, clear the hallway
- Oh no, blast door is locked right in front of you
- Leave the hallway, find a way to open the blast door
- Fight through narrow passage to the heart of the island
- Fight Hunters in the open
- Open the blast door
- Restock at crashed Pelican
- Back to the entrance
- Fight through multiple levels of the underground complex
- Obtain the map
- Fight your way out, including a fight in the hallway (again)
- Extract
That’s a solid list – a few things to narrow down (backtracking, we don’t have a Warthog) and streamline.
The Result
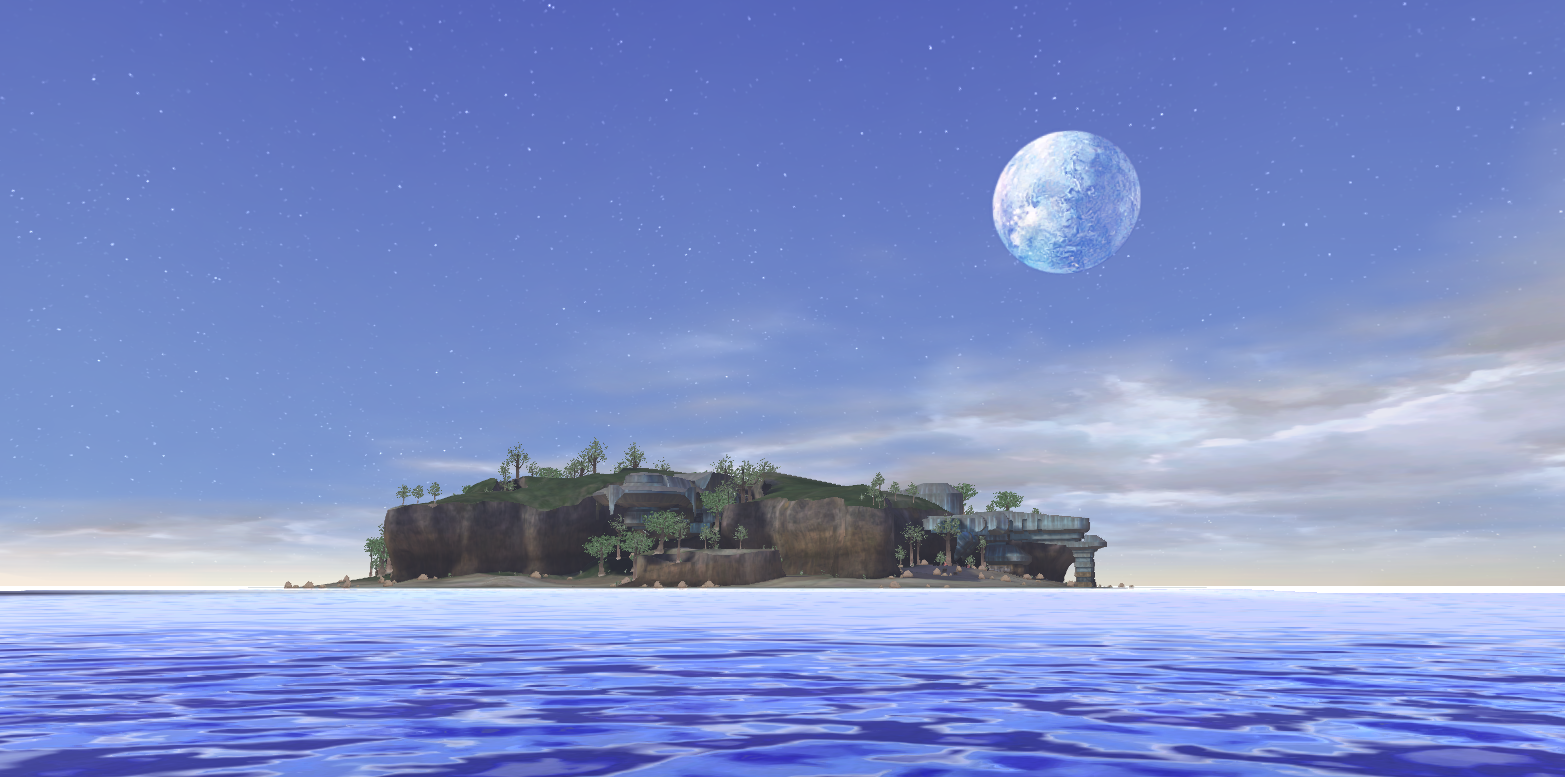
I discovered that the entire island is viewable on https://noclip.website/, so I was able to take some neat screenshots!
Landing: Tidal Flats. C1/S2/TL1

Island Shoreline. C0/S2/TL1
There is actual cover here in the game, but I found that making it Exposed to be a more interesting mix in gameplay.

Facility Approach. C1/S2/TL1
Clearing the exterior of the Facilty.

Facility Entry Hallway. C2/S0/TL2
Good example of Cover 2, Space 0: Plenty of cover, but you can’t really maneuver to gain a good angle of fire at the enemy.

Then: a bit of a narrative skip. The mission skips over the circling around on the island, for pacing.
Narrow Ridge. C1/S0/TL2

Hilltop Platform. C1/S1/TL3

I also edited out the room you reach after this fight (another Hunter encounter).
We montage past the crashed Pelican (and gain reinforcements, if needed), and then montage right back past the Facility Approach/Facility Entry Hallway, to enter…
Upper Ruins C1/S1/TL2

Lower Ruins C1/S1/TL2

We reach the objective after this, and then revisit the Lower Ruins, Upper Ruins and Hallway.
And there it is! I feel like this is a good showcase of the versatility of the DANGER CLOSE rules, and what it’s trying to do.


Leave a Reply